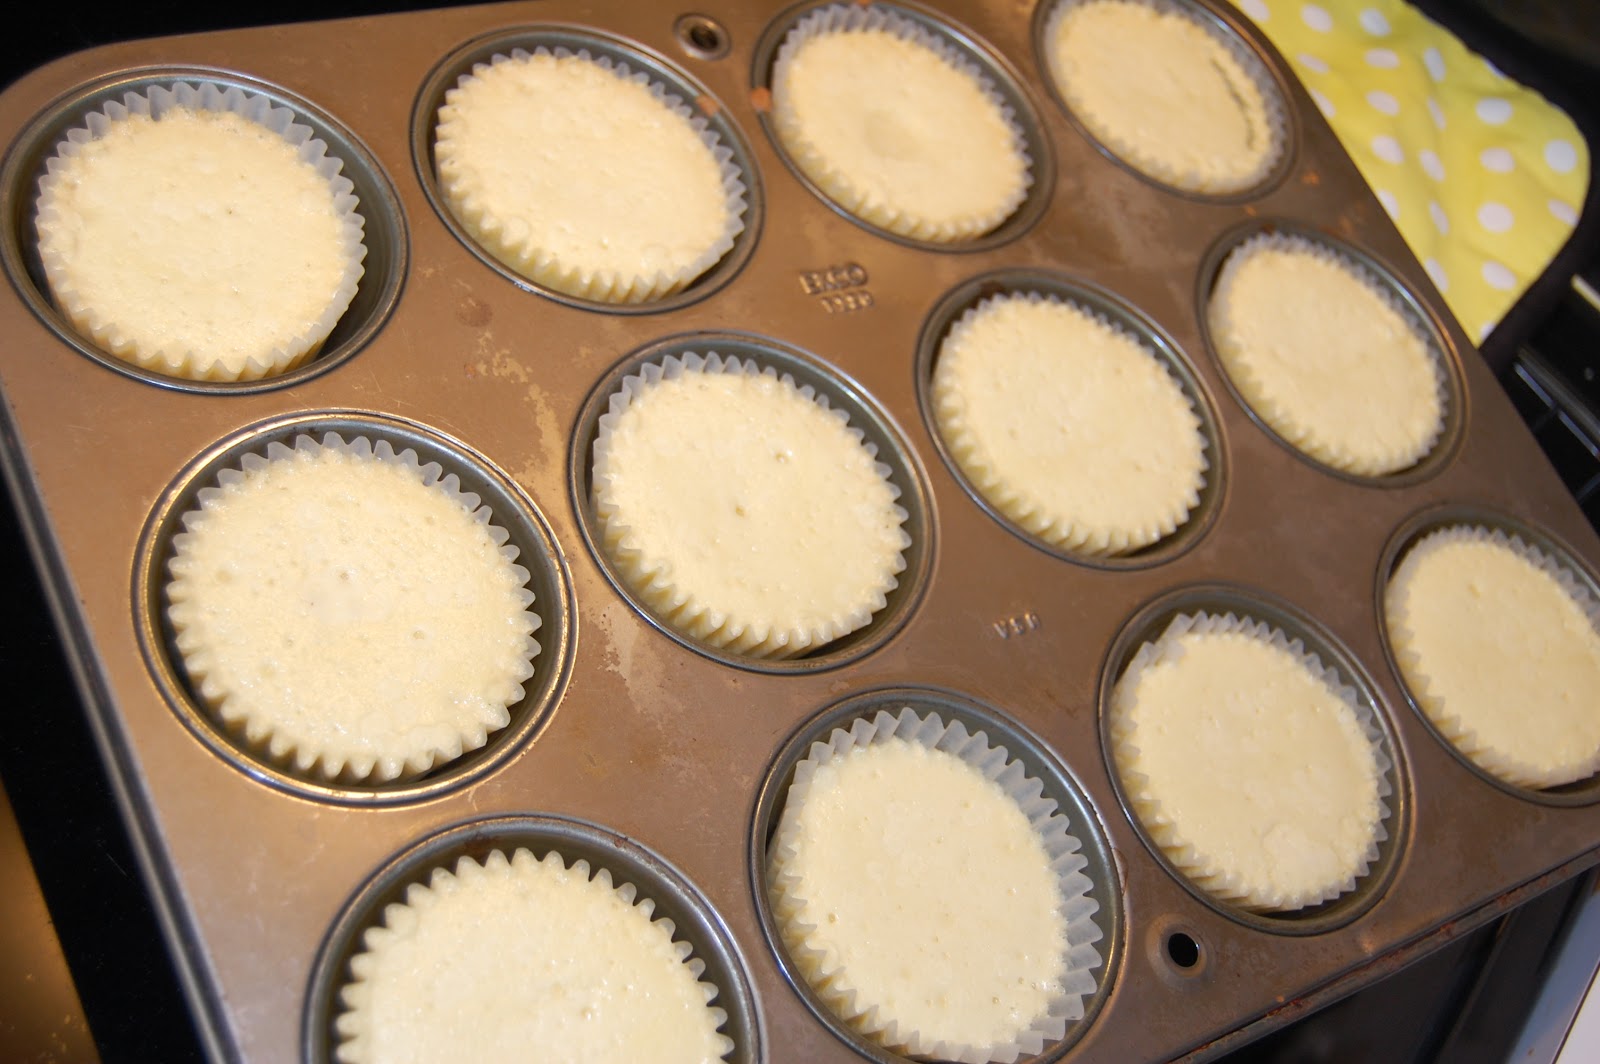
Okay, so as all of you know, I've changed the format of this blog a little. I've gone from trying to stritcly show off my cupcake and cake pop creations, to sharing all of the great recipes I come across that I just can't wait to share with the world. This was supposed to be one of those recipes. I happened across this recipe when I was looking at blogs that were listed with foodieblogroll.com. I thought to myself, what a great reason to go buy that beatiful brown bottle of Kahlua I've been swooning over since before Christmas. Let's just say this recipe didn't turn out the way I was expecting it to. This just goes to show that even when you follow the directions with all of the right ingredients, if the tilt of the earth is not quite right, marshmallows won't set up. Okay, okay, so I can't blame it on the tilt of the earth, wasn't it just Nationa Blame It On Someone Else Day?
The above picture is about the best picture I got out of this entire process. I should have known from the beginning that this wasn't going to work. First off, here's the recipe I used, I got it here.
Peppermint Mocha Kahlua Marshmallows – yield one 9×9 tray
3 packages unflavored gelatin (I did not have packages of gelatin, I had a bulk bag, I found online that that each package contains about 2 teaspoons of gelatin)
1/2 c Peppermint Mocha Kahlua
2/3 c light corn syrup
1/4 c water
2 c granulated sugar
1/4 c cornstarch
1/4 c icing sugar
1 tbs espresso powder (optional)
In the bowl of a standing mixer pour in Peppermint Mocha Kahlua. Sprinkle gelatin on top. Set aside.
Line a 9×9 baking pan with plastic wrap and spray with non-stick cooking spray. Spray a spatula with non-stick spray and set with your pan.
In a medium size sauce pan add corn syrup, granulated sugar and water. Turn to medium heat and whisk until the sugar is dissolved. Try not to let any of the sugar mixture splash up the sides of the pan. Stop stirring and clip on your candy thermometer. Heat mixture without stirring until it reaches 240 F.
Once it hits 240 F (soft ball stage) remove from heat and pour directly over the Peppermint Mocha Kahlua. It’s gonna bubble and steam. Attach the whisk attachment to your standing mixer and start mixing. Start on low and increase to high so it won’t splash everywhere. Mix on high for 10 minutes or until your peaks get stiff. Do not scrap down the bowl.
Using your prepared spatula pour mixture into your prepared pan. The stuff is STICKY and stringy so be prepared. Once in the pan let sit for 4 hours or overnight until set.
Once set flip onto a cutting board and using a greased pizza cutter cut marshmallows into what ever size you like. In a large ziplock bag add confectioners sugar, corn starch and espresso powder. Shake the marshmallows in the mixture to prevent them from sticking together.
Now, let's jump back to the part where it says to use your candy thermometer, yep, first mistake. I could not find my candy thermometer anywhere! But I thought, 240 degrees is 240 degrees right? Why do I have to use a candy thermometer, I have a thermometer we use for our turkey deep fryer, that should work! Apparently not! As soon as I put it in the boiling pot of sugar, it immediatly went to 240. I've worked with candy long enough to know it doesn't set to soft ball stage the instant it boils so I knew I needed to let it boil a little longer. And I remember seeing something somewhere about dropping some of the mixture into water to see what stage it was at, well tried that too. Who knows what stage mine was it, certainly not set enough for marshmallows, I found that out a little too late in the process though.
After I mixed the syrup into the gelatin and Kahlua and whisked it to high heaven it still wouldn't peak, even after 15 minutes. I just had this sick feeling in my stomach that this wasn't working, and no, I didn't sample too much of the Kahlua! I kept on going, I poured the mixture into my prepared pan and with a slight glimmer of hope I let them sit. Afterall, in the original recipe she says that they'll be sticky and mine were totally sticky!
It says to let the mixture sit for 4 hours or overnight (now in my world, my overnight is a little longer than 4 hours) but I couldn't wait so 4 hours came and went, it was time to sample these delectible delights and dunk them in some hot chocolate.
Here's what they ended up like!
Yeah, from what I remember, marshmallows aren't supposed to run, unless they're oozing out from between two graham crackers. Now you see why this is titled Take 1. This whole process didn't turn out the way I had hoped, the good thing is, now I know, and I still have some Kahlua left so Round 2 will be coming soon!
Sunday, January 15, 2012
Saturday, January 14, 2012
Lemon Olive Oil Cupcake with Goat Cheese Frosting
I have been a fan of the show Cucpake Wars since it started a few years ago, but what's with all of the odd flavors. Every time I watch the show it makes me want to get up off of my butt and go into my pantry and find the oddest flavors I can find an throw them into a cupcake. And as all of you know, they would turn out perfect! They would taste wonderful and everyone would want to indulge in a sea of odd cupcake creations right? Yeah, not so much. Well I was inspired after watching all of my DVR'd episodes over Christmas break to actually try making something that I hear so much about on Cupcake Wars. I alway hear them talking about mascarpone cheese and swiss meringue buttercream (I'll get to those someday). And what about goat cheese? Goat Cheese? Really? On a cupcake? Yes! On a cupcake!
I had never tried goat cheese before in my life. I figured I better try it first before putting it on or in a cupcake so that I know if it really tastes the way it should. I went to the grocery and bought a single package of goat cheese. It reminded me a lot of cream cheese but with more of a tang to it. It was very creamy and smooth, but again, I couldn't get past the sour tang that the cheese left behind. I didn't love it, but I didn't hate it either, and I figured that anything with powdered sugar and a cupcake behind it wouldn't taste so bad in the end anyway. So now that I've tasted the cheese. What was I going to put with it to make my tastebuds happy? I needed a flavor that wasn't as strong as the cheese, or anything that would overpower it. I did some searching again, on my most favorite cupcake site, http://www.cupcakeproject.com/ and found a recipe for an olive oil cupcake. I thought to myself, I've always wanted to try an olive oil cupcake, sounds like now is the time (and I liked it even more that I had most of the ingredients on hand to make it). Here's the recipe with the changes that I made to it.
Lemon Olive Oil Cupcakes
Makes about 12 cupcakes.
- 2 C all-purpose flour
- 1 1/2 t baking powder
- Pinch of salt
- 1 C granulated sugar
- 2/3 C extra virgin olive oil
- 1 T lemon zest
- 3 large eggs
- 1/2 C lemon juice
- 2 T finely chopped fresh thyme (I left this out of my cupcakes)
- Sift together the flour, baking powder, and salt into a large bowl.
- In a mixing bowl, combine sugar and lemon zest and rub together to extract the fragrant oil from the zest.
- Add olive oil and mix on high speed until completely combined (preferably with the whisk attachment).
- Beat in the eggs, one at a time, beating well after each addition.
- Add 1/3 of the flour mixture and mix on slow speed.
- Add half of the lemon juice and continue mixing.
- Add another 1/3 of the flour mixture, followed by the rest of the lemon juice and the remaining flour mixture and beat until combined between each addition.
- Stir in the thyme (Again, I left this out because I didn't have any on hand)
- Fill cupcake liners 3/4 full.
- Bake at 350 for 15 minutes or until they bounce back when touched. (This is different from the original recipe. I found that baking things at a higher temp in my oven really dries them out.)
These cupcakes came out nice and fluffy, and had a great lemon flavor to them. I think the next time I make them though, I will use a little more lemon zest in them, but I like my lemon cupcakes to be lemony, you do yours however you like.
Next onto the goat cheese frosting. I figured that I couldn't use just the goat cheese by itself, so I added in some cream cheese. Here's the recipe I used for the frosting.
Goat Cheese Frosting
8 oz of goat cheese, room temperature
8 oz of cream cheese, room temperature
3 cups of confectioner's sugar
Combine goat cheese and cream cheese in a large mixing bowl with whisk attahcment. The cheeses will become very creamy the more you mix them. Slowly add in the powdered sugar until it is well combined and easy to spread or pipe onto the cupcakes.
That's it! Easy peasy lemon squeezy! I piped the frosting on the cupcakes and topped with these cute little sugar bees that I found here.
These were such a different tasting cupcake. The cake itself had a nice olive oil taste to it along with the lemon and then the tang of the goat cheese just played nicely with the cupcakes. I'm still trying to figure out another flavor of cupcake that would compliment this tangy yet smooth frosting. I guess I'm going to have to keep trying!!
Wednesday, January 11, 2012
Chicken Cheddar Cheese Soup Bread Bowls
I'm sitting here thinking as I look out my front window, "what is the date today? Hmm? January 11,2012. Shouldn't we have at least a little bit of snow by now?" This is just crazy, yesterday it was 48 degrees, today it's raining, maybe by the weekend we'll get a dusting of snow. A dusting? Really God? It's January in Ohio, you do remember what that's supposed to be like right? I guess I shouldn't complain too much, it has been kind of nice not being a prisoner in my own home because of 30 inch snow drifts. Don't get me wrong, I'll take the rain and 40 degree temperatures any day over snow and ice, but once in a while to make it feel like winter it's nice to be able to shovel snow. What?! Did I really just say that?! Yes, I did.
As I was putting together my grocery list last week, I thought to myself, I should really make some soup. That sounds good. Ooohh, and even better yet, let's make soup and put it in bread bowls!! Homemade bread bowls!! So I filled out what seemed like a never ending list of items and off to the grocery I went. I decided on Chicken Cheddar Cheese Soup in Sourdough Bread Bowls.
Now, just a little note for all of you adventurous people out there, sourdough bread is not something you can just whip up over night, much to my surprise. It has to be planned, grown, fed, and cared for like an infant child. Minus the dirty diapers :o) I decided I better start this over a weekend. Here's the sourdough recipe that I used.
BASIC SOURDOUGH STARTER
3 c warm water (approx. 110 degrees F)
1 1/2 tablespoons active dry yeast
1 teaspoon sugar
3 cups all-purpose flour
In a large bowl, combine the water, yeast, and sugar. Let sit until the yeast becomes foamy, about 5 minutes. (If the yeast does not foam, discard the mixture and begin again with a new yeast.)
Add the flour and stir vigorously to work air into the mixture. Cover with a towel let rest in a warm, draft-free place (an oven with its pilot light or light bulb turned on works well) for 8 to12 hours. (The mixture should become very bubbly.) Use immediately or cover loosely with plastic wrap and store in the refrigerator.
Preserving the Starter: Each time you remove a portion of the starter for a recipe, reserve at least 1/4 cup and replace the amount you have taken out with equal amounts of flour and water.
For example, if you remove 1 cup of starter, you must replace it with 1 cup of flour and 1 cup of warm water. Whisk these ingredients into the starter until blended but not completely smooth, cover loosely, and return to the refrigerator. Also, the starter must be maintained by feeding it every few days. Refresh by removing 1 cup of the starter (give to a friend or discard it) and adding 1 cup of flour and 1 cup of warm water. Whisk until blended but not smooth. Cover loosely and return to the refrigerator.
If you plan to be away longer than a week, freeze the starter in a sterilized, airtight freezer container. Thaw the starter 2 days before you plan to bake with it. Refresh as indicated above with 1 cup each of flour and warm water. Cover and leave at room temperature 12 hours or overnight before using.
CAUTION: Never keep your starter tightly closed! The gasses expelled by the yeast will build up pressure and may cause the container (such as a glass jar) to burst!
I left my mixture sit over night before using it to mix up the bread. I have a feeling though, that had I left it longer and "fed" it a few times that the bread would have had a much sour taste to it.
BASIC SOURDOUGH BREAD
2 cups bread flour ( I used all-purpose and it worked fine)
1 1/2 cups sourdough starter
3/4 teaspoon salt
In a bowl mix all ingredients together. Once it starts to mix together pour it out onto a lightly floured work surface and mix until combined well. Try not to over work dough. Place in a lightly oiled bowl, turning to coat. Cover with plastic wrap and let dough rise in a warm, draft-free place until doubled in size, 1 to 1 1/2 hours. Turn out onto a lightly floured surface. Sprinkle lightly with flour and knead gently, removing any large air bubbles. Knead into a small circle, then shape into a tight ball (for bread bowls, separate dough in half and shape into two tight balls), pinching the seams together underneath. Place on a well-floured board or baking peel, seam-side down. Cover with a kitchen towels and let rest until doubled in size, about 1 hour. Once dough has risen, preheat oven to 400 and lower oven rack to the lowest setting. With a sharp serrated knife cut an "X" in the top of the dough. Bake dough for 60 minutes or until outside is a nice golden brown color. I brushed the outside of my bread bowls with butter when they came out of the oven.
As if these weren't good enough to eat, I decided to fill them with one of my most favorite soup recipes. We have a restaurant here in Sidney, C.J. Highmarks. They have the absolute best Chicken Cheese Soup. It's always so warm and cheesy, I've been trying for years to replicate this recipe. Well to my surprise a few years ago, my mother-in-law created one that was pretty darn close to their recipe. Here's how you make it.
Chicken Cheddar Cheese Soup
3 large chicken breasts, cooked and cubed or shredded
3 carrots, peeled and sliced
3 large potatoes, peeled and sliced
1 small onion, diced
1 lb. velveeta cheese, cubed
1 1/2 cups whole milk
scallions, chopped for topping
shredded cheddar cheese
Boil the potatoes, carrots, and onions in a pan until tender. Drain, place back in pan and set aside. In a medium sauce pan, melt Velveeta cheese in a 1/2 cup of milk on low heat. Watch this closely, stir frequently, this can burn very easily, trust me, I've done it more than once :) Once cheese is melted, pour the cheese mixture over the potatoes and carrots and place back on the stove. Add in chicken. Turn burner on low and add remaning 1 cup of milk. Simmer on low until soup thickens. Pour soup into bread bowls, top with shredded cheese and scallions. Serve and Enjoy!!!
Even on a not so cold, rainy winter day this soup is perfect! It takes a little time to put it all together, and you can certainly cheat on the bread bowl part and buy some from a "P" named restaurant (their's are pretty good) but from scratch is even better!! Enjoy the soup! And check back to see what I made for dessert!!
As I was putting together my grocery list last week, I thought to myself, I should really make some soup. That sounds good. Ooohh, and even better yet, let's make soup and put it in bread bowls!! Homemade bread bowls!! So I filled out what seemed like a never ending list of items and off to the grocery I went. I decided on Chicken Cheddar Cheese Soup in Sourdough Bread Bowls.
Now, just a little note for all of you adventurous people out there, sourdough bread is not something you can just whip up over night, much to my surprise. It has to be planned, grown, fed, and cared for like an infant child. Minus the dirty diapers :o) I decided I better start this over a weekend. Here's the sourdough recipe that I used.
BASIC SOURDOUGH STARTER
3 c warm water (approx. 110 degrees F)
1 1/2 tablespoons active dry yeast
1 teaspoon sugar
3 cups all-purpose flour
In a large bowl, combine the water, yeast, and sugar. Let sit until the yeast becomes foamy, about 5 minutes. (If the yeast does not foam, discard the mixture and begin again with a new yeast.)
Add the flour and stir vigorously to work air into the mixture. Cover with a towel let rest in a warm, draft-free place (an oven with its pilot light or light bulb turned on works well) for 8 to12 hours. (The mixture should become very bubbly.) Use immediately or cover loosely with plastic wrap and store in the refrigerator.
Preserving the Starter: Each time you remove a portion of the starter for a recipe, reserve at least 1/4 cup and replace the amount you have taken out with equal amounts of flour and water.
For example, if you remove 1 cup of starter, you must replace it with 1 cup of flour and 1 cup of warm water. Whisk these ingredients into the starter until blended but not completely smooth, cover loosely, and return to the refrigerator. Also, the starter must be maintained by feeding it every few days. Refresh by removing 1 cup of the starter (give to a friend or discard it) and adding 1 cup of flour and 1 cup of warm water. Whisk until blended but not smooth. Cover loosely and return to the refrigerator.
If you plan to be away longer than a week, freeze the starter in a sterilized, airtight freezer container. Thaw the starter 2 days before you plan to bake with it. Refresh as indicated above with 1 cup each of flour and warm water. Cover and leave at room temperature 12 hours or overnight before using.
CAUTION: Never keep your starter tightly closed! The gasses expelled by the yeast will build up pressure and may cause the container (such as a glass jar) to burst!
I left my mixture sit over night before using it to mix up the bread. I have a feeling though, that had I left it longer and "fed" it a few times that the bread would have had a much sour taste to it.
BASIC SOURDOUGH BREAD
2 cups bread flour ( I used all-purpose and it worked fine)
1 1/2 cups sourdough starter
3/4 teaspoon salt
In a bowl mix all ingredients together. Once it starts to mix together pour it out onto a lightly floured work surface and mix until combined well. Try not to over work dough. Place in a lightly oiled bowl, turning to coat. Cover with plastic wrap and let dough rise in a warm, draft-free place until doubled in size, 1 to 1 1/2 hours. Turn out onto a lightly floured surface. Sprinkle lightly with flour and knead gently, removing any large air bubbles. Knead into a small circle, then shape into a tight ball (for bread bowls, separate dough in half and shape into two tight balls), pinching the seams together underneath. Place on a well-floured board or baking peel, seam-side down. Cover with a kitchen towels and let rest until doubled in size, about 1 hour. Once dough has risen, preheat oven to 400 and lower oven rack to the lowest setting. With a sharp serrated knife cut an "X" in the top of the dough. Bake dough for 60 minutes or until outside is a nice golden brown color. I brushed the outside of my bread bowls with butter when they came out of the oven.
| Mixing the water, yeast, sugar, and flour. |
| This is what the mixture looked like after sitting overnight. |
| The beginnings of the sourdough bread. |
| Split dough into two balls for bread bowls. |
| Allow dough to rise and then cut an "X" pattern in the top. |
| The beautiful babies after they come out of the oven! |
As if these weren't good enough to eat, I decided to fill them with one of my most favorite soup recipes. We have a restaurant here in Sidney, C.J. Highmarks. They have the absolute best Chicken Cheese Soup. It's always so warm and cheesy, I've been trying for years to replicate this recipe. Well to my surprise a few years ago, my mother-in-law created one that was pretty darn close to their recipe. Here's how you make it.
Chicken Cheddar Cheese Soup
3 large chicken breasts, cooked and cubed or shredded
3 carrots, peeled and sliced
3 large potatoes, peeled and sliced
1 small onion, diced
1 lb. velveeta cheese, cubed
1 1/2 cups whole milk
scallions, chopped for topping
shredded cheddar cheese
Boil the potatoes, carrots, and onions in a pan until tender. Drain, place back in pan and set aside. In a medium sauce pan, melt Velveeta cheese in a 1/2 cup of milk on low heat. Watch this closely, stir frequently, this can burn very easily, trust me, I've done it more than once :) Once cheese is melted, pour the cheese mixture over the potatoes and carrots and place back on the stove. Add in chicken. Turn burner on low and add remaning 1 cup of milk. Simmer on low until soup thickens. Pour soup into bread bowls, top with shredded cheese and scallions. Serve and Enjoy!!!
| Peeled potatoes, with the best ever potato peeler from Wal-Mart! |
| Boil potatoes, carrots, and onions. |
| Cheese sauce ready to mix into potatoes and carrots. |
| Add in chicken and remaining milk. |
Even on a not so cold, rainy winter day this soup is perfect! It takes a little time to put it all together, and you can certainly cheat on the bread bowl part and buy some from a "P" named restaurant (their's are pretty good) but from scratch is even better!! Enjoy the soup! And check back to see what I made for dessert!!
Sunday, January 8, 2012
A Man's Cupcake
So a few months ago dear hubby went to a little get together with some of his best buddies. Me being the wife that I am and the cupcake fanatic I am I decided to send along some of my most favorite Chocolate Stout Cupcakes. Although all of the guys devoured them (like most people would), one of our good friends sent home a challenge made just for me. He requested at their next "man party" that I make Meatloaf Cupcakes with Brown Gravy and Mashed Potatoes. Well, that can't be too hard. Let's give it a shot. Now let me give you a little back ground here.
I, myself grew up on meatloaf and mashed potatoes. I've loved it since before I even knew what meatloaf was, and even after I knew I still love it. However, in my current household, I never get to make it. Dear hubby is anti-meatloaf, in fact he's anti-anything with the word loaf in it, kind of guy. Well, except for bread. Anyways, I rarely get the opportunity to make meatloaf so this challenge was not only exciting to figure out, but a scrumptious idea because, did I mention, I LOVE MEATLOAF!
I did some searching online and came across a website that I knew had to have tasty, sinful recipes on it, besides the name is http://www.stickygooeycreamychewy.com/ that just screams goodness! She infact had a meatloaf and mashed potatoes cupcake recipe. I headed right to the grocery and meat market! I used her recipe and changed it up a little bit to accomodate the request for brown gravy. Here's what we ended up with.
This recipe is very easy to follow. Here's their recipe with my changes added in.
I, myself grew up on meatloaf and mashed potatoes. I've loved it since before I even knew what meatloaf was, and even after I knew I still love it. However, in my current household, I never get to make it. Dear hubby is anti-meatloaf, in fact he's anti-anything with the word loaf in it, kind of guy. Well, except for bread. Anyways, I rarely get the opportunity to make meatloaf so this challenge was not only exciting to figure out, but a scrumptious idea because, did I mention, I LOVE MEATLOAF!
I did some searching online and came across a website that I knew had to have tasty, sinful recipes on it, besides the name is http://www.stickygooeycreamychewy.com/ that just screams goodness! She infact had a meatloaf and mashed potatoes cupcake recipe. I headed right to the grocery and meat market! I used her recipe and changed it up a little bit to accomodate the request for brown gravy. Here's what we ended up with.
| Meatloaf Cupcakes filled with brown gravy topped with mashed potates and more gravy. Oh yeah, and baked in bacon "cupcake liners"! |
For the meatloaf:
1 pound ground beef
1 pound ground pork
1 small onion, grated
1 teaspoon garlic powder
1 teaspoon salt
1/2 teaspoon black pepper
1 cup panko crumbs
2-3 splashes Worcestershire sauce
1 tablespoons parsley
1/4 cup milk
2 eggs, lightly beaten
For the sauce:
1 package brown gravy mix
1 cup of cold water
For the potato “icing”:
3 cups potatoes, chopped into chunks
1 egg yolk
1/4 cup heavy cream
Pinch of salt
2 tablespoons melted butter
Directions
Preheat your oven to 350 F.
Prepare the meatloaf by combining all ingredients together in a large bowl. Mix until incorporated. Don’t over handle the mixture or the meatloaf may be too dense. Lightly spray a cupcake tin with nonstick cooking spray. Fill each cup with a small handful of the meat mixture, gently pressing it down until it is completely filled. (If you want the bacon "cupcake liners" simply cut a strip of bacon in half and make an "X" in the bottom of the cupcake tin pressing down gently and then add in the meatloaf mixture). Bake for 40 min or until the meat is cooked through.
While the meat is baking, boil the potatoes until tender, drain. Place potatoes back in pan or in a bowl and whip with egg yolk, heavy cream, salt and butter. Fit a pastry bag with a large star or round tip (I had to use a round tip, I still had some chunks in my potatoes) and fill with the potato mixture. I placed the bag of potatoes in the fridge until the meatloaves were done.
On the stove combine the brown gravy mix and water according to the package directions. Let cool slightly.
Turn the broiler in the oven on and set the rack to the highest setting.
Using a sharp knife hollow out the center of each cupcake making a well to place some brown gravy in. Spoon about a teaspoon/tablespoon (whatever will fit without running out) into the well. Pipe some potato “icing” on top of each cupcake. Put the cupcakes under the broiler for a few minutes until the potatoes are lightly browned.
Remove from the oven, drizzle some more gravy over the top if you so desire, and get ready to enjoy a most manly, fantastic meatloaf and mashed potatoes cupcake!
Makes 12-16 meatloaf cupcakes.
This meatloaf recipe was so good. It will be my go to recipe for those few times that I actually get to make it here at the Campbell House. Oh, and the verdict is still out on whether I won the challenge or not. I'm thinking I did, and I'm waiting to hear what the next challenge will be!
1 pound ground beef
1 pound ground pork
1 small onion, grated
1 teaspoon garlic powder
1 teaspoon salt
1/2 teaspoon black pepper
1 cup panko crumbs
2-3 splashes Worcestershire sauce
1 tablespoons parsley
1/4 cup milk
2 eggs, lightly beaten
For the sauce:
1 package brown gravy mix
1 cup of cold water
For the potato “icing”:
3 cups potatoes, chopped into chunks
1 egg yolk
1/4 cup heavy cream
Pinch of salt
2 tablespoons melted butter
Directions
Preheat your oven to 350 F.
Prepare the meatloaf by combining all ingredients together in a large bowl. Mix until incorporated. Don’t over handle the mixture or the meatloaf may be too dense. Lightly spray a cupcake tin with nonstick cooking spray. Fill each cup with a small handful of the meat mixture, gently pressing it down until it is completely filled. (If you want the bacon "cupcake liners" simply cut a strip of bacon in half and make an "X" in the bottom of the cupcake tin pressing down gently and then add in the meatloaf mixture). Bake for 40 min or until the meat is cooked through.
While the meat is baking, boil the potatoes until tender, drain. Place potatoes back in pan or in a bowl and whip with egg yolk, heavy cream, salt and butter. Fit a pastry bag with a large star or round tip (I had to use a round tip, I still had some chunks in my potatoes) and fill with the potato mixture. I placed the bag of potatoes in the fridge until the meatloaves were done.
On the stove combine the brown gravy mix and water according to the package directions. Let cool slightly.
Turn the broiler in the oven on and set the rack to the highest setting.
Using a sharp knife hollow out the center of each cupcake making a well to place some brown gravy in. Spoon about a teaspoon/tablespoon (whatever will fit without running out) into the well. Pipe some potato “icing” on top of each cupcake. Put the cupcakes under the broiler for a few minutes until the potatoes are lightly browned.
Remove from the oven, drizzle some more gravy over the top if you so desire, and get ready to enjoy a most manly, fantastic meatloaf and mashed potatoes cupcake!
Makes 12-16 meatloaf cupcakes.
This meatloaf recipe was so good. It will be my go to recipe for those few times that I actually get to make it here at the Campbell House. Oh, and the verdict is still out on whether I won the challenge or not. I'm thinking I did, and I'm waiting to hear what the next challenge will be!
Thursday, January 5, 2012
Corporate Cake Pops!
What some of you might not know about me is that this is just my part time job. You see, I have a wide variety of education and employment back ground (I guess I'm still trying to find my niche in life). I have gone from being in Business Adminstration, to Computer Science, to Medical Assisting, to Massage Therapy, to Medical Billing & Coding, and now to Cupcakes and Cake Pops. And all of these jobs have pretty much been at the same Physicians Office that I've been at now for close to 13 years. It's a great job and I get to meet so many new and interesting people. I've met some of my best friends there. I've also had alot of corporate networking opportunities. Which is was leads me to this post. We recently switched to a new Network IT company. Agil IT. Now I have to say, this company has alot of great employees. Very well educated. Very dedicated to their jobs. Very focused. But also alot of fun! I've gotten to know a few of them very well. Check out their page and you'll see just what I'm talking about. I decided it was time to pay AgilIT back for all of the hard work that they have done for us. I decided to make Wes and his crew some cake pops. And what would be better than to make cake pops look like their company logo.
I love doing stuff like this. I love the look on people's faces when you hand them a special treat made just for them. I've always thought it would be fun to work for a florist. To be able to deliver flowers all day long, well except for the funeral part of it. That's why I think cupcakes and cake pops are even better! Agil IT has been a great company to work with and I would highly suggest them for any of your IT needs. They are a great group of people to work with. In fact I've been challenged asked to do more cake pops for some of their other customers. I hope they have turned out how they wanted them.
| Kettering Family Practice logo Cake Pops |
| Chocolate Cake Pops for KFP |
If anyone is interested in ordering any Cupcakes or Cake Pops for their company of any of their associates please let me know. I'd love to keep trying different designs!!
Wednesday, January 4, 2012
Eskimo Ice Cream Cupcakes
Recipe Post #3. So now that you've been here a few times what do you think? I keep telling myself that I want to keep trying new recipes, new foods, new techniques in cooking, in fact those are number 4, 5, and 6 on my 2012 New Years Resolution list. Number 1, 2, and 3 I'm still working on, you know, the typical ones, loose weight, exercise, be more organized. Ok, so I haven't done great so far, but hey, It's only the 4th of January, I've got time! This blog is another part of my resolutions, I want to have some place where people can come see what's going on in my kitchen. A place where new and exciting recipes can be found, as well as those old, traditional, family favorites. I started this blog with the intentions of growing my cupcake business, and it has helped, but I want now to focus more on what is going on, rather than just the end result. I want you to share with your family and friends these great recipes and ideas. Today's recipe I had never heard of until this past summer when I met and became friends with this crazy lady that dear hubby was doing some work for. You see, he's kind of a handy, fix-it-all kind of guy, who has the gift of gab with people. I met my now new friend Kris while dear hubby was installing some new windows. We chatted for a bit and the next thing you know, we're discussing recipes and cupcakes. She asked me if I had ever heard of Akutaq (pronouced a-goo-duk). Me being a midwestern flatlander I responded with an odd look I'm sure and politely said no. She told me that she thought it would make a great addition to a cupcake. She forwarded me the recipe and told me a little history and traditions behind akutaq. I thought after reading the recipe, how in the world would this ever work as part of a cupcake. I kind of dismissed the idea of using it and went on with baking cupcakes that were "normal".
After a few months the thought finally came back to me again that I really should try this recipe, after hearing Kris talk about it and watching some videos online I decided it was time to try it. After all, New Year's Resolution #4 & #8 are to try new recipes and to add an element of surprise to my blog. So here goes!
Akutaq (again, it's pronounced a-goo-duk for us non-Yupik folk) is a Yupik word for mix it together. For white man it's Eskimo Ice Cream. This recipe has been made by native Alaskans for many years as a food for survival. When they went out to go hunting they brought along akutaq. Akutaq can also be made with moose meat and fat, caribou meat and fat, fish, seal oil, berries and other Alaskan things. But no worries, there is no fish, moose, caribou or any other living, breathing item in my recipe.
I have to stop for a minute and add a bit of honesty here. I know. It sounds disgusting, and it wasn't until I mixed it all together and tasted the smallest little bit that I possibly could that I realized, this isn't so bad after all. In fact, I remember the first word out of my mouth, "WOW". As in, "this is really good, why haven't I tried this before now?"
Okay, so, back to the recipe. I was trying to figure out just how I could use this with a cupcake and then I came across this. A cold-oven pound cake. Yep, that's right. Cold Oven. When I read the title of that recipe I can honestly say that I was confused and wondered if it was some type of no-bake cupcake. But that's not what the recipe said, it said Cold-Oven Pound Cake (honestly it probably should be called cooler temperature oven pound cake, but that doesn't sound as cool!) My friend Stef at Cupcake Project is amazing with cupcake recipes, a true cupcake genius! If you get the chance you should check out her website. So anyways, I was thinking, with this Akutaq I needed a cupcake that wasn't so expressive, or bold in flavor. The pound cake recipe was perfect! I made it just how it was written. You see cold oven pound cake is just your typical pound cake recipe baked in an oven that is not preheated and baked at a lower temperature for a longer period of time. She also mentioned in the recipe that she baked half at the lower not preheated temperature and half at a preheated 350 degree temperature. I did the same. Both batches turned out amazing, with slightly different textures and flavors. You do whichever you prefer, or maybe even both. I have to say, the recipe says that it makes 20 cupcakes, from one single recipe I got easily 48 cupcakes so beware.
Okay, so there are your cupcakes. Like I mentioned in the captions to the pictures, the cold oven cupcakes came out with a chewy top crust to the cakes with a little stronger almond flavor. The preheated oven ones had the flaky top crust, more of a dense cake with less of an almond flavor. I'm not sure if the higher temperature does something to the almond extract or not. They both tasted amazing though! I'd recommend them either way. And they are great plain, with no topping. But personally I like a nicely dressed cupcake. So onto the topping!! Oh, and by the way, I forgot to mention. I would say that neither of these recipes are heart healthy, just sayin!! :o)
For the Akutaq:
2 cups mashed potatoes. (Traditionally this part is made with boiled slamon or white fish.)
1 cup of lard or Crisco (I was able to get lard from my M.I.L. so that's what I used)
1 1/2 cup white sugar
1/4 cup Canola oil (I left this out. It was soft when I mixed it together, I didn't feel it needed more oil)
1 quart of salmon berries (I couldn't use these, salmon berries are not readily available in Ohio :)
1 quart of red raspberries
1 quart of blueberries
Mix mashed potatoes and lard together. Slowly add in sugar until it's very well combined. Beat on med high for about 3 minutes to make sure it is very well mixed. Slowly add in berries. Keep refrigerated.
Now, I knew that I was using this to top a cupcake so I mixed the berries in with my mixer, from what I mostly saw online, it is usually mixed by hand or the berries are folded in after mixing the other ingredients together. Another note of interest, I was feeling lazy today, so I used instant mashed potato flakes. I'm not sure if it would change the consistency of the Akutaq if you were to use real potatoes. I'm sure it would make it a bit more stiff. I'll try that next time, but for now, it worked using instant.
Here you go! The final product! Eskimo Ice Cream Cupcakes! A little piece of Alaska wherever you are in the world!!
After a few months the thought finally came back to me again that I really should try this recipe, after hearing Kris talk about it and watching some videos online I decided it was time to try it. After all, New Year's Resolution #4 & #8 are to try new recipes and to add an element of surprise to my blog. So here goes!
Akutaq (again, it's pronounced a-goo-duk for us non-Yupik folk) is a Yupik word for mix it together. For white man it's Eskimo Ice Cream. This recipe has been made by native Alaskans for many years as a food for survival. When they went out to go hunting they brought along akutaq. Akutaq can also be made with moose meat and fat, caribou meat and fat, fish, seal oil, berries and other Alaskan things. But no worries, there is no fish, moose, caribou or any other living, breathing item in my recipe.
I have to stop for a minute and add a bit of honesty here. I know. It sounds disgusting, and it wasn't until I mixed it all together and tasted the smallest little bit that I possibly could that I realized, this isn't so bad after all. In fact, I remember the first word out of my mouth, "WOW". As in, "this is really good, why haven't I tried this before now?"
Okay, so, back to the recipe. I was trying to figure out just how I could use this with a cupcake and then I came across this. A cold-oven pound cake. Yep, that's right. Cold Oven. When I read the title of that recipe I can honestly say that I was confused and wondered if it was some type of no-bake cupcake. But that's not what the recipe said, it said Cold-Oven Pound Cake (honestly it probably should be called cooler temperature oven pound cake, but that doesn't sound as cool!) My friend Stef at Cupcake Project is amazing with cupcake recipes, a true cupcake genius! If you get the chance you should check out her website. So anyways, I was thinking, with this Akutaq I needed a cupcake that wasn't so expressive, or bold in flavor. The pound cake recipe was perfect! I made it just how it was written. You see cold oven pound cake is just your typical pound cake recipe baked in an oven that is not preheated and baked at a lower temperature for a longer period of time. She also mentioned in the recipe that she baked half at the lower not preheated temperature and half at a preheated 350 degree temperature. I did the same. Both batches turned out amazing, with slightly different textures and flavors. You do whichever you prefer, or maybe even both. I have to say, the recipe says that it makes 20 cupcakes, from one single recipe I got easily 48 cupcakes so beware.
For the cupcakes:
- 1 1/2 C unsalted butter
- 3 C sugar
- 6 eggs (cold)
- 3 C sifted cake flour (I used all-purpose flour since that was all I had on hand, and it worked well)
- 1 C whole milk, VERY cold
- 1 t vanilla extract
- 1 t almond extract (Use any extract here that you like)
- Cream butter and sugar together.
- Beat in eggs, one at a time.
- Beat in flour, one cup at a time, alternating with milk.
- Add extracts.
- Beat on medium-high to high speed for two minutes, scraping down sides of bowl.
- Fill cupcake liners 3/4 full.
- Place on middle rack in a COLD oven and bake at 275 F for 1 hour.
| Simple ingredients, butter, eggs, vanilla extract, almond extract, flour, sugar, and milk. |
| Cream the butter and sugar. Add in the eggs. |
| Add in flour and milk. Mix well. Add in the extracts. |
| The finished batter. It smelled wonderful and reminded me of my mom's sugar cookies. |
| My little 1/2 pint kitchen helper! |
| Fill the cups 3/4 full. Place on center rack of a cold oven. Preheat to 275 and bake. |
| The finished cold oven almond pound cakes. |
| A closer look at the cold oven ones. A nice chewy layer on the top of the cakes. A great almond flavor to the cake. |
| The batch baked in a preheated 350 degree oven. More of a flaky top crust, but more of a dense cake and less almond flavor. |
| Just another shot of the preheated oven ones. |
Okay, so there are your cupcakes. Like I mentioned in the captions to the pictures, the cold oven cupcakes came out with a chewy top crust to the cakes with a little stronger almond flavor. The preheated oven ones had the flaky top crust, more of a dense cake with less of an almond flavor. I'm not sure if the higher temperature does something to the almond extract or not. They both tasted amazing though! I'd recommend them either way. And they are great plain, with no topping. But personally I like a nicely dressed cupcake. So onto the topping!! Oh, and by the way, I forgot to mention. I would say that neither of these recipes are heart healthy, just sayin!! :o)
For the Akutaq:
2 cups mashed potatoes. (Traditionally this part is made with boiled slamon or white fish.)
1 cup of lard or Crisco (I was able to get lard from my M.I.L. so that's what I used)
1 1/2 cup white sugar
1/4 cup Canola oil (I left this out. It was soft when I mixed it together, I didn't feel it needed more oil)
1 quart of salmon berries (I couldn't use these, salmon berries are not readily available in Ohio :)
1 quart of red raspberries
1 quart of blueberries
Mix mashed potatoes and lard together. Slowly add in sugar until it's very well combined. Beat on med high for about 3 minutes to make sure it is very well mixed. Slowly add in berries. Keep refrigerated.
Now, I knew that I was using this to top a cupcake so I mixed the berries in with my mixer, from what I mostly saw online, it is usually mixed by hand or the berries are folded in after mixing the other ingredients together. Another note of interest, I was feeling lazy today, so I used instant mashed potato flakes. I'm not sure if it would change the consistency of the Akutaq if you were to use real potatoes. I'm sure it would make it a bit more stiff. I'll try that next time, but for now, it worked using instant.
Here you go! The final product! Eskimo Ice Cream Cupcakes! A little piece of Alaska wherever you are in the world!!
Saturday, December 31, 2011
Pink Champagne and Raspberries
When I think of Pink Champagne all I can think about is the movie Breakfast at Tiffany's. I've never seen the movie and I have no idea what the movie is about, but I know Pink Champagne plays a role in the film. I've never had pink champagne, but I do know that I like the white kind so I figured that I'd probably like pink one just as well. When I started thinking of new ideas for cupcake flavors I decided to try a Pink Champagne Cupcake. I googled the idea I came across alot of different recipes. Some from scratch, some from a box mix and decided to stick with my usual and go with the scratch recipe that I found.
I came across a website that first struck me with the images of a beautifully designed Pink Champagne Cupcake. Then I started reading. This website was started in 2011 with hopes of raising awareness and funds for cancer research. I encourage each of you to go this website and read more about it. It is amazing all of the stories and recipes that are posted there.
I went ahead and did an inventory of the recipe and found that I had all of the products in my pantry to make these cupcakes, but of course decided to change it just a little. Here's the recipe that I used. It was adapted from Intoxicated Cupcakes by Kate Legere. The recipe said that it makes about 20 cupcakes. However, I ended up with 30 standard size cupcakes.
Pink Champagne Cupcakes with Raspberry Buttercream Frosting
For the Cupcakes
6 large egg whites (save 3 yolks)
1/4 tsp cream of tartar
5 ounces (1 1/4 sticks) unsalted butter, at room temperature
6 large egg whites (save 3 yolks)
1/4 tsp cream of tartar
5 ounces (1 1/4 sticks) unsalted butter, at room temperature
1 1/2 cups sugar, divided
3 egg yolks
3 egg yolks
1 tsp vanilla bean paste (or vanilla extract)
2 2/3 cups all purpose flour
1 tbsp baking powder
1 tsp salt
3/4 cup Pink Champagne
4 drops red food coloring (optional, but it does make it pink)2 2/3 cups all purpose flour
1 tbsp baking powder
1 tsp salt
3/4 cup Pink Champagne
For the filling
1 - 1.4 oz package instant vanilla pudding mix (try the white chocolate for a whiter center)
1/2 cup milk
1/4 cup Pink Champagne
1 cup unsalted butter, at room temperature
1/2 cup fresh red raspberries
1 tsp vanilla bean paste (or vanilla extract)
1-2 tbsp Pink Champagne
4 1/2 cups confectioners’ sugar
1-2 tbsp Pink Champagne
4 1/2 cups confectioners’ sugar
Directions
1. Preheat oven at 350, line cupcake pan, set aside2. In a clean bowl, beat the egg whites and cream of tartar until soft peaks, then slowly beat in 1/4 cup sugar. Beat until glossy stiff peaks, but not dry. Set aside.
3. In a mixing bowl, cream the butter and sugar until light and fluffy. Add the egg yolks, vanilla bean paste and red food coloring and beat well.
4. Sift the dry ingredients together. Add the dry ingredients to the butter mixture, alternating with the Pink Champagne, mixing well after each addition.
5. Fold in 1/3 of the egg whites to lighten the batter. Fold in the remaining egg whites carefully not to deflate the egg whites.
6. Use an ice cream scoop to fill the prepared cups. You want them about 3/4 full. Bake for 16-18 minutes until a toothpick inserted comes out clean. They should not be brown on the top. Springy. Cool on a wire rack for 5 minutes, then remove from the pan and cool completely before filling.
7. Combine the filling ingredients together and whisk for about a minute until smooth. Refrigerate until set, about 5 minutes. Place in a piping bag or a zip-top bag.
8. Remove a core of each cupcake. I just used a sharp knife to carve out a cone shape from the top of the cupcake. Keep the cored piece. Fill each hole with some cream filling, and replace the cored piece, gently pressing down.
9. For the buttercream, in a bowl of an electric mixer cream the butter, and vanilla. Mix on low speed, until well combined. Increase speed to medium and beat for 1 minute.
10. Add the sifted confectioners’ sugar slowly on low speed. Beat for 1 minute, scrape the sides, and slowly increase the speed to medium. Add in the raspberries and continue mixing until they are mixed well into the frosting.
12. Spread or pipe on cupcakes.
Here is what they look like on the inside. A nice fluffy cupcake, filled with a creamy vanilla champagne center and topped with fresh raspberry frosting, what could be better than that!
I wish I could capture in pictures just how good these cupcakes are. When they came out of the oven it was like a time machine for me, it took me back to a time when my mom worked at a local bakery. The smell of the cupcakes was exactly what the bakery used to smell like. I'm wondering if Mr. Daniel used champagne for anything??
Subscribe to:
Posts (Atom)